AI Video Creation: A Comprehensive Guide for Beginners
AI Video Creation has transformed how we tell stories, share knowledge, and connect with audiences online. I remember when creating videos meant spending hours learning complex software, wrestling with expensive equipment, and feeling frustrated by the steep learning curve. Today, artificial intelligence has changed everything. Whether you’re a small business owner wanting to showcase your products, a teacher creating educational content, or someone with a story to share, AI-powered tools make video creation accessible to everyone—no film school degree required.
In this guide, I’ll walk you through the entire process of creating videos using AI, from your first idea to your finished product. You’ll discover how these tools work, which ones to choose, and exactly how to use them step by step. By the end, you’ll have the confidence to create your own professional-looking videos.
Understanding AI Video Creation Basics
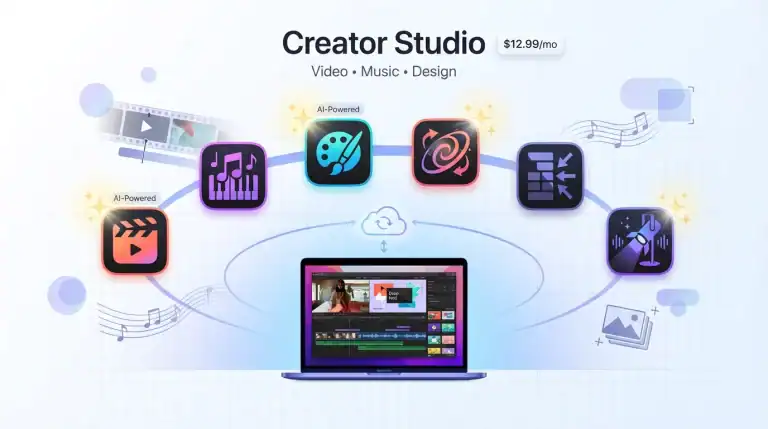
Before we dive into the practical steps, let’s clarify what AI video creation actually means. These are software tools that use artificial intelligence to automate and simplify various aspects of video production. Instead of manually editing every frame or spending hours on animation, AI handles the heavy lifting for you.
What Can AI Video Tools Do?
Modern AI video platforms can help you with:
- Script writing and content structuring
- Converting text into engaging video content
- Generating voiceovers in multiple languages and accents
- Creating animations and visual effects automatically
- Editing footage with smart suggestions
- Adding subtitles and captions instantly
- Selecting appropriate background music
The beauty of these tools is that they work intuitively. You provide the content and creative direction, while the AI handles the technical execution. Think of it as having a skilled video editor and animator working alongside you, ready to implement your ideas instantly.
How Does AI Video Creation Work?
Artificial intelligence video generation operates through several interconnected technologies. When you input text, the AI analyzes your content using natural language processing to understand context, tone, and key messages. It then matches this information with visual elements from vast libraries—stock footage, images, animations, and graphics.
The system makes intelligent decisions about which visuals complement your message, how long each scene should last, and where transitions work best. Advanced algorithms handle synchronization between audio, text, and visuals, ensuring everything flows naturally. Some platforms even generate entirely new visual content using generative AI models, creating unique images or video clips that don’t exist in any stock library.
What makes this remarkable is the speed. Tasks that once took professionals hours or days now happen in minutes.
Choosing Your AI Video Creation Tool!
The market offers numerous AI-powered video makers, each with different strengths. Here’s how to select the right one for your needs:
For Complete Beginners
If you’re just starting out, look for platforms with intuitive interfaces and pre-made templates. Tools like Pictory, InVideo, and Lumen5 excel at transforming blog posts or scripts into videos quickly. These platforms guide you through each step with simple prompts and suggestions.
For Content Creators and Marketers
If you need regular video content for social media or marketing campaigns, consider tools like Synthesia or HeyGen that specialize in creating presenter-style videos with AI avatars. These are perfect for explainer videos, product demonstrations, or educational content where you want a human presence without being on camera yourself.
For Advanced Customization
When you want more control over every element, platforms like Runway ML or Descript offer powerful features, including AI-assisted editing, green screen removal, and advanced audio manipulation. These require a bit more learning but provide professional-grade results.
Pro tip: Most platforms offer free trials. I always recommend testing two or three options before committing to a subscription. This hands-on experience will quickly show you which interface feels most natural for your workflow.
Step-by-Step Guide to Creating Your First AI Video
Now let’s get practical. I’ll walk you through the complete process of creating videos with AI, from concept to completion.
Step 1: Plan Your Video Content
Start with a clear purpose. Ask yourself:
- What message do I want to communicate?
- Who is my target audience?
- What action should viewers take after watching?
Write down your main points. For a 60-second video, aim for one main idea. For longer content, break your message into three to five key sections. This planning phase is crucial—AI tools work best when you give them clear direction.
I find it helpful to create a simple outline first. For example, if you’re making a video about healthy breakfast ideas, your outline might look like:
- Hook: “Tired of boring breakfasts?”
- Three quick, healthy recipes
- Benefits of starting your day right
- Call to action: “Try one tomorrow!”
Step 2: Write or Generate Your Script
AI script generation can jumpstart your content creation. Many video platforms include built-in AI writing assistants that help craft compelling scripts. Simply provide your topic and key points, and the AI suggests complete scripts with proper pacing and structure.
Here’s how to use AI for scriptwriting effectively:
Open your chosen platform’s script editor and enter your topic. Be specific—instead of “healthy eating,” try “five-minute healthy breakfast recipes for busy professionals.” The AI will generate a draft script that you can customize.
Read through the generated content carefully. AI provides an excellent foundation, but your personal touch makes it authentic. Add your own examples, adjust the tone to match your personality, and modify any phrases that don’t feel natural when you read them aloud.
Keep sentences short and conversational. Remember, viewers will be listening, not reading. If a sentence feels too complex or formal, simplify it. I always read my scripts out loud before finalizing them—if I stumble over words, I rewrite those sections.
Step 3: Choose Your Video Style and Template
Most AI video platforms offer templates designed for different purposes—social media posts, YouTube videos, advertisements, tutorials, and more. Browse the template library and select one that matches your content type and aesthetic preference.
Templates typically include pre-designed layouts, transition styles, font choices, and color schemes. Don’t worry if the template isn’t perfect initially—you’ll customize it in later steps. The template simply provides a professional starting framework.
Consider your distribution platform. Vertical videos (9:16 ratio) work best for Instagram Stories, TikTok, and YouTube Shorts. Horizontal videos (16:9 ratio) suit YouTube main content, websites, and presentations. Square videos (1:1 ratio) perform well on Facebook and Instagram feeds. Many AI tools let you create multiple formats from the same project automatically.
Step 4: Upload or Select Visual Content
Now comes the creative part—adding visuals that bring your script to life. You have several options:
Using stock libraries: Most AI video tools include access to millions of stock photos and video clips. Type keywords related to your content, and the platform displays relevant options. The AI often suggests visuals automatically based on your script, which saves significant time.
Uploading your own content: If you have original photos, video footage, or graphics, upload them directly. This personalization makes your video unique and authentic. Even smartphone footage works well—AI tools can enhance quality, stabilize shaky videos, and adjust colors automatically.
AI-generated visuals: Some advanced platforms create custom images using text-to-image AI. Describe the scene you envision, and the AI generates a unique visual. This is particularly useful when stock footage doesn’t quite match your vision.
A common mistake beginners make is overcrowding videos with too many visual changes. Each scene should display long enough for viewers to absorb the information—typically three to five seconds minimum. Let visuals breathe.
Step 5: Add Voiceover or Text-to-Speech
AI voiceover technology has become remarkably natural-sounding. You have two main approaches:
Recording your voice: If you’re comfortable on a microphone, recording yourself adds authentic personality. Most platforms include audio recording tools. Find a quiet space, speak clearly at a moderate pace, and smile while talking—it genuinely affects your tone. If you make mistakes, don’t worry. You can re-record specific sections without starting over.
Using AI text-to-speech: When you prefer not to record yourself or need content in multiple languages, AI voices provide excellent alternatives. Modern text-to-speech technology offers natural-sounding voices with proper intonation and emotion.
Select a voice that matches your content’s mood. Friendly, conversational voices work well for tutorials and casual content. Professional, authoritative voices suit corporate or educational material. Most platforms let you preview voices before committing.
Adjust the speaking speed if needed. The default pace works for most content, but you might slow down for complex information or speed up slightly for energetic, dynamic videos.
Important tip: Always review the pronunciation of technical terms, names, or unusual words. AI voices occasionally mispronounce specialized vocabulary. Most platforms let you adjust pronunciation phonetically or replace specific audio segments.
Step 6: Customize and Edit Your Video
With your basic elements in place, refine your video’s details. This customization transforms a good video into a great one.
Text and captions: Add text overlays to emphasize key points. Studies show that 85% of social media videos are watched without sound, making captions essential. Many AI tools auto-generate captions from your voiceover—review these for accuracy and adjust timing as needed.
Keep text readable with high contrast against backgrounds. White text with a dark shadow or colored box behind it ensures visibility. Limit on-screen text to one key message at a time.
Transitions and effects: Smooth transitions between scenes maintain visual flow. Simple cuts work perfectly fine—you don’t need fancy effects for every transition. Use subtle fades or slides when moving between different topics or scenes.
Avoid excessive effects that distract from your message. Beginning creators often overuse zooms, spins, and other animations. Remember: your content is the star, and effects should support, not overpower, your message.
Music and sound effects: Background music sets the mood and maintains energy. Choose tracks that complement without competing with your voiceover. The AI platform’s music library typically offers royalty-free options categorized by mood—upbeat, calm, dramatic, and inspirational.
Keep music volume lower than voiceover—typically 20-30% of the voiceover level. The music should be noticeable but shouldn’t require viewers to strain to hear your words.
Step 7: Review and Refine
Before finalizing, watch your entire video at least twice. During the first viewing, focus on content flow and messaging. Does your video clearly communicate the intended message? Do scenes transition logically?
On the second viewing, check technical details:
- Are captions synchronized correctly?
- Is audio balanced throughout?
- Do all visual elements display long enough?
- Are there any awkward cuts or timing issues?
Common mistakes to watch for:
- Text appearing or disappearing too quickly
- Background music overwhelming voiceover
- Abrupt ending without clear call-to-action
- Inconsistent visual style between scenes
- Spelling or grammar errors in captions
Most platforms include preview modes that show how your video appears on different devices. Check both mobile and desktop views, as text size and element positioning may need adjustment.
Step 8: Export and Optimize
When you’re satisfied with your video, it’s time to export. Choose the appropriate quality settings for your intended platform:
For social media: HD resolution (1080p) balances quality and file size. Higher resolutions increase upload times and storage requirements without significant visual improvement on mobile devices.
For websites: Consider embedding options that optimize loading speed. Some AI platforms provide hosting links or embed codes.
For presentations: Export in the highest available quality to ensure clarity on large screens.
File format matters: MP4 offers the best compatibility across platforms. MOV provides slightly better quality but may not play on all devices.
Before uploading to your final destination, save a master copy to your computer or cloud storage. This backup lets you re-upload if needed without rebuilding the entire video.

Best AI Video Creation Tools to Get Started
Let me share specific AI video editing tools that I’ve used successfully, along with what makes each one special for beginners.
Pictory: Best for Blog-to-Video Conversion
Pictory excels at transforming written content into engaging videos. If you already have blog posts, articles, or scripts, simply paste your text, and Pictory automatically creates scene suggestions, matches relevant visuals, and adds voiceover. The interface is remarkably intuitive—I created my first video in under 15 minutes.
Pricing starts with a free trial that lets you create three video projects. This gives you enough experience to decide if it fits your needs before committing to a subscription.
Synthesia: Perfect for Presenter-Style Videos
When you need a professional presenter without being on camera yourself, Synthesia provides AI avatars that look and sound remarkably human. You type your script, choose an avatar and voice, and the AI generates a video of your virtual presenter delivering your content.
This tool is particularly valuable for training videos, product explanations, or any content where a human presence enhances credibility. The avatars support over 120 languages, making international content creation simple.
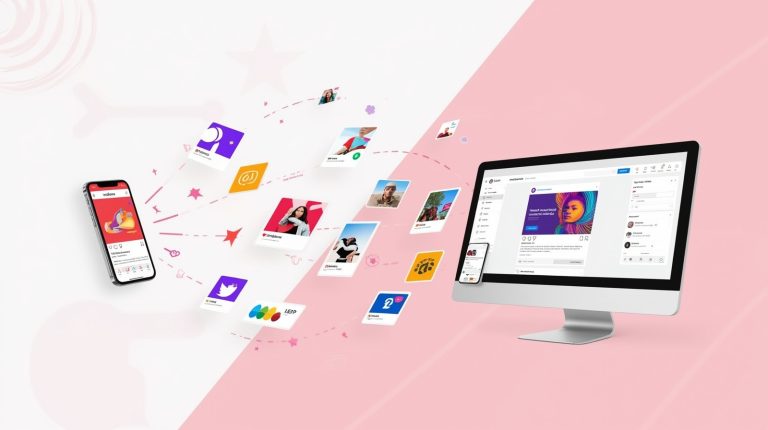
Lumen5: Ideal for Social Media Content
Lumen5 specializes in creating short, engaging videos optimized for social media platforms. The platform includes trending formats, aspect ratio presets for different platforms, and an impressive library of licensed music and footage.
What I appreciate about Lumen5 is how it analyzes your text and suggests the most engaging phrases for visual emphasis. This feature helps ensure your key messages stand out, even when viewers watch without sound.
Descript: All-in-One for Advanced Users
Once you’re comfortable with the basics, Descript offers professional-grade capabilities with an innovative approach to editing. You edit videos by editing text transcripts—delete a sentence from the transcript, and that portion disappears from the video. This text-based editing feels natural and intuitive.
Descript includes powerful features like AI video enhancement, background noise removal, filler word deletion, and even the ability to create an AI voice clone of yourself for future projects.
Tips for Creating Better AI Videos
After creating dozens of videos with AI tools, I’ve learned several strategies that consistently improve results:
Start with Strong Hooks
Your opening three seconds determine whether viewers keep watching. Begin with a compelling question, surprising statement, or clear benefit. Instead of “Today I’ll talk about healthy eating,” try “What if I told you the breakfast you ate this morning is sabotaging your energy levels?”
Keep Videos Concise
Attention spans are short. For social media, aim for 30-90 seconds. For YouTube tutorials, 5-10 minutes works well. Educational content can extend longer if providing significant value, but ensure every second serves a purpose.
Maintain Visual Consistency
Choose a color palette and stick with it throughout your video. Consistent fonts, transition styles, and graphic elements create a professional, cohesive appearance. Many viewers judge content quality by visual presentation, even subconsciously.
Add Captions Always
Even when voiceover quality is excellent, include captions. Many viewers watch videos in sound-sensitive environments—during commutes, at work, or late at night. Captions make your content accessible to everyone, including the hearing impaired.
Test Different Formats
Create the same video in multiple aspect ratios and test performance across platforms. A vertical video that thrives on Instagram Stories might underperform on YouTube. Let data guide your format choices for future projects.
Optimize Thumbnails and Titles
AI tools focus on video content, but your thumbnail and title determine whether people click to watch. Create eye-catching thumbnails with clear text overlays and compelling imagery. Write titles that clearly communicate value while incorporating your primary keywords naturally.
Common Mistakes Beginners Should Avoid
Learning from others’ mistakes saves time and frustration. Here are errors I made early on—so you don’t have to:
Overcomplicating Your First Videos
Many beginners try to incorporate every feature and effect available. This results in cluttered, overwhelming videos that confuse rather than engage. Start simple. Master basic video creation before adding complex effects or advanced techniques.
Ignoring Audio Quality
Poor audio ruins even beautifully designed videos. If recording your own voiceover, invest in a decent microphone—even a $30 USB microphone dramatically improves quality compared to laptop built-in mics. When using AI voices, always preview the complete audio before finalizing.
Not Defining Your Audience
Creating videos “for everyone” often means connecting with no one. Before starting, clearly identify your target viewer. What problems do they face? What questions do they ask? What tone resonates with them? AI-generated video content performs best when tailored to specific audiences.
Neglecting Calls-to-Action
Every video should guide viewers toward a next step—visiting your website, subscribing to your channel, trying a product, or learning more about a topic. Without clear direction, viewers may enjoy your content but take no action.
Skipping the Planning Phase
The temptation to dive straight into AI tools is strong, especially when they make creation so quick. However, videos created without planning often lack focus and coherence. Those 10-15 minutes of upfront planning save hours of revision later.
Advanced Techniques as You Progress
Once comfortable with basic AI video production, explore these advanced capabilities:
Multi-Language Versions
Many AI platforms allow you to duplicate projects and swap voiceovers for different languages. This feature lets you reach global audiences without creating entirely new videos. Some tools even automatically adjust captions and text overlays for different languages.
A/B Testing Video Variations
Create multiple versions of the same video with different hooks, calls to action, or visual styles. Test these variations on your audience to discover what resonates most effectively. AI tools make creating variations quick and inexpensive.
Batch Video Creation
Once you’ve refined your process, create multiple videos in batches. Write several scripts, set up templates, and produce a week or month of content in a single session. This efficiency lets you maintain consistent posting schedules even during busy periods.
Integrating Custom Branding
As your skills grow, incorporate custom logos, branded color schemes, and unique graphic elements. Most AI platforms support uploading custom assets that appear across all your videos, creating recognizable brand consistency.
Repurposing Content Strategically
One well-researched video can become multiple pieces of content. Extract key points for social media clips, create teaser videos that drive traffic to full versions, or transform video content into blog posts, infographics, or podcasts. AI-powered video creation makes this repurposing efficient and effective.
Measuring Success and Improving Over Time
Creating videos is only half the journey—understanding their performance helps you improve continuously.
Key Metrics to Track
Focus on these indicators:
View count: Shows total reach, but don’t obsess over this number alone. A video with 500 engaged views often provides more value than 5,000 passive views.
Watch time and retention: These metrics reveal how much of your video people actually watch. If most viewers drop off after 10 seconds, your hook needs improvement. If they watch 80% but leave before your call to action, extend engagement throughout.
Engagement rate: Likes, comments, and shares indicate how well your content resonates emotionally. Higher engagement typically correlates with better algorithmic promotion on social platforms.
Click-through rate: For videos with links or calls-to-action, this shows how many viewers take your desired next step. A/B test different calls to action to optimize this metric.
Learning from Analytics
Review your video performance weekly or monthly. Identify patterns—which video styles perform best? What topics generate the most engagement? Which video lengths maintain viewer attention?
Apply these insights to future projects. If tutorial-style videos consistently outperform talking-head formats, adjust your content strategy accordingly. Let data guide your creative decisions without stifling creativity entirely.
Gathering Viewer Feedback
Analytics provide quantitative data, but qualitative feedback offers deeper insights. Read comments carefully, noting questions viewers ask or suggestions they make. This feedback often reveals content gaps you can fill with future videos.
Consider directly asking your audience what they want to see. Simple polls on social media or within your videos help guide content direction while making viewers feel heard and valued.
Frequently Asked Questions About AI Video Creation
Resources to Continue Your Learning Journey
Your AI video creation journey doesn’t end here. These resources provide ongoing education and inspiration:
Online Communities
Join creator communities on platforms like Reddit (r/videography, r/AI_tools), Facebook groups dedicated to AI content creation, or Discord servers where creators share techniques and feedback. Learning from others’ experiences accelerates your growth.
YouTube Tutorials
Many AI video platforms maintain YouTube channels with detailed tutorials, feature updates, and creative tips. Following these channels keeps you informed about new capabilities and best practices.
Platform Documentation
Each AI tool offers comprehensive help centers with articles, video guides, and troubleshooting resources. When stuck, these official resources often provide the most accurate solutions.
Experimentation
Your best teacher is hands-on practice. Create videos regularly, even if just for personal projects. Experiment with different styles, try features you haven’t used before, and don’t fear making mistakes. Every video you create sharpens your skills and deepens your understanding.
The Future of AI Video Creation
Artificial intelligence video generation continues evolving rapidly. Recent developments include real-time video generation, more realistic AI avatars, and tools that can generate entire scenes from text descriptions alone—no stock footage needed.
Future capabilities may include AI directors that suggest optimal camera angles and transitions, systems that automatically generate B-roll footage matching your script, and tools that adapt videos dynamically based on viewer preferences and behavior.
Staying current with these developments keeps your skills relevant, but don’t wait for perfect tools before starting. Today’s AI platforms already provide everything needed to create exceptional video content. The best time to begin is now.
Taking Your First Steps Today
AI Video Creation removes the traditional barriers to video production—expensive equipment, technical expertise, and time-consuming editing. You now have the knowledge and understanding to create your first video using AI tools.
Start simple. Choose one of the beginner-friendly platforms mentioned, sign up for a free trial, and create a short 30-60 second video about something you know well. Don’t aim for perfection. Focus on completing the process from start to finish.
Your first video won’t be your best—and that’s perfectly fine. Each video you create improves your skills, builds your confidence, and clarifies what works for your specific goals. The creators producing amazing content today all started with imperfect first attempts.
Video content continues growing as the preferred medium for learning, entertainment, and communication online. By mastering AI-powered video creation, you’re building a valuable skill that opens doors professionally and creatively. Whether sharing your expertise, growing a business, or expressing your creativity, you now have the tools to make your vision visible.
The technology is ready. The tools are accessible. Your unique perspective and stories deserve to be shared. Create your first AI video today—I promise you’ll be amazed at what you can accomplish.
References:
Synthesia.io – Official Platform Documentation
Pictory.ai – Video Creation Guidelines
Lumen5.com – Social Media Video Best Practices
Descript.com – Advanced Video Editing Features
HowAIdo.com – AI Tools Research 2025

About the Author
Abir Benali is a friendly technology writer who specializes in making AI tools accessible to non-technical users. With a passion for demystifying complex technology, Abir creates clear, actionable guides that empower beginners to confidently explore AI capabilities. Through straightforward explanations and practical examples, Abir helps readers discover how AI tools can simplify their creative and professional projects. When not writing about AI, Abir enjoys experimenting with emerging technologies and finding innovative ways to solve everyday challenges.